

Experience tutorial
 Fast synthesis
 1.
Click the "Quick Synthesis" button on the top menu to enter the synthesis page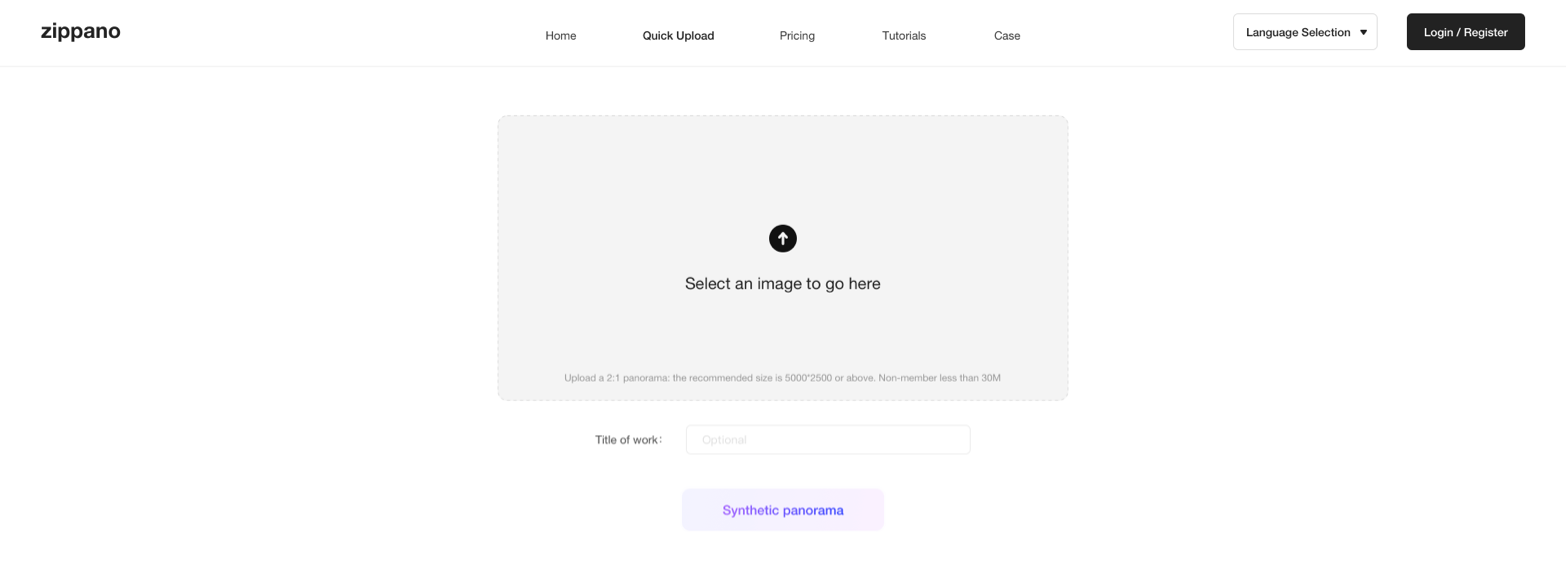
2.
Click the upload box to upload a 2:1 panorama and enter the name of the work.3.
Click to start synthesis. It will take 1-3 minutes to synthesize successfully and you will jump to the editing page.Things to note:
·
Upload panorama files locally with an aspect ratio of 2:1; the format is JPG;·
It is recommended that the image size be less than 30M, the size should be more than 5000px, and no more than 18000px; Quick edit 1.
Click the "Add Scene" button on the left to upload a new scene.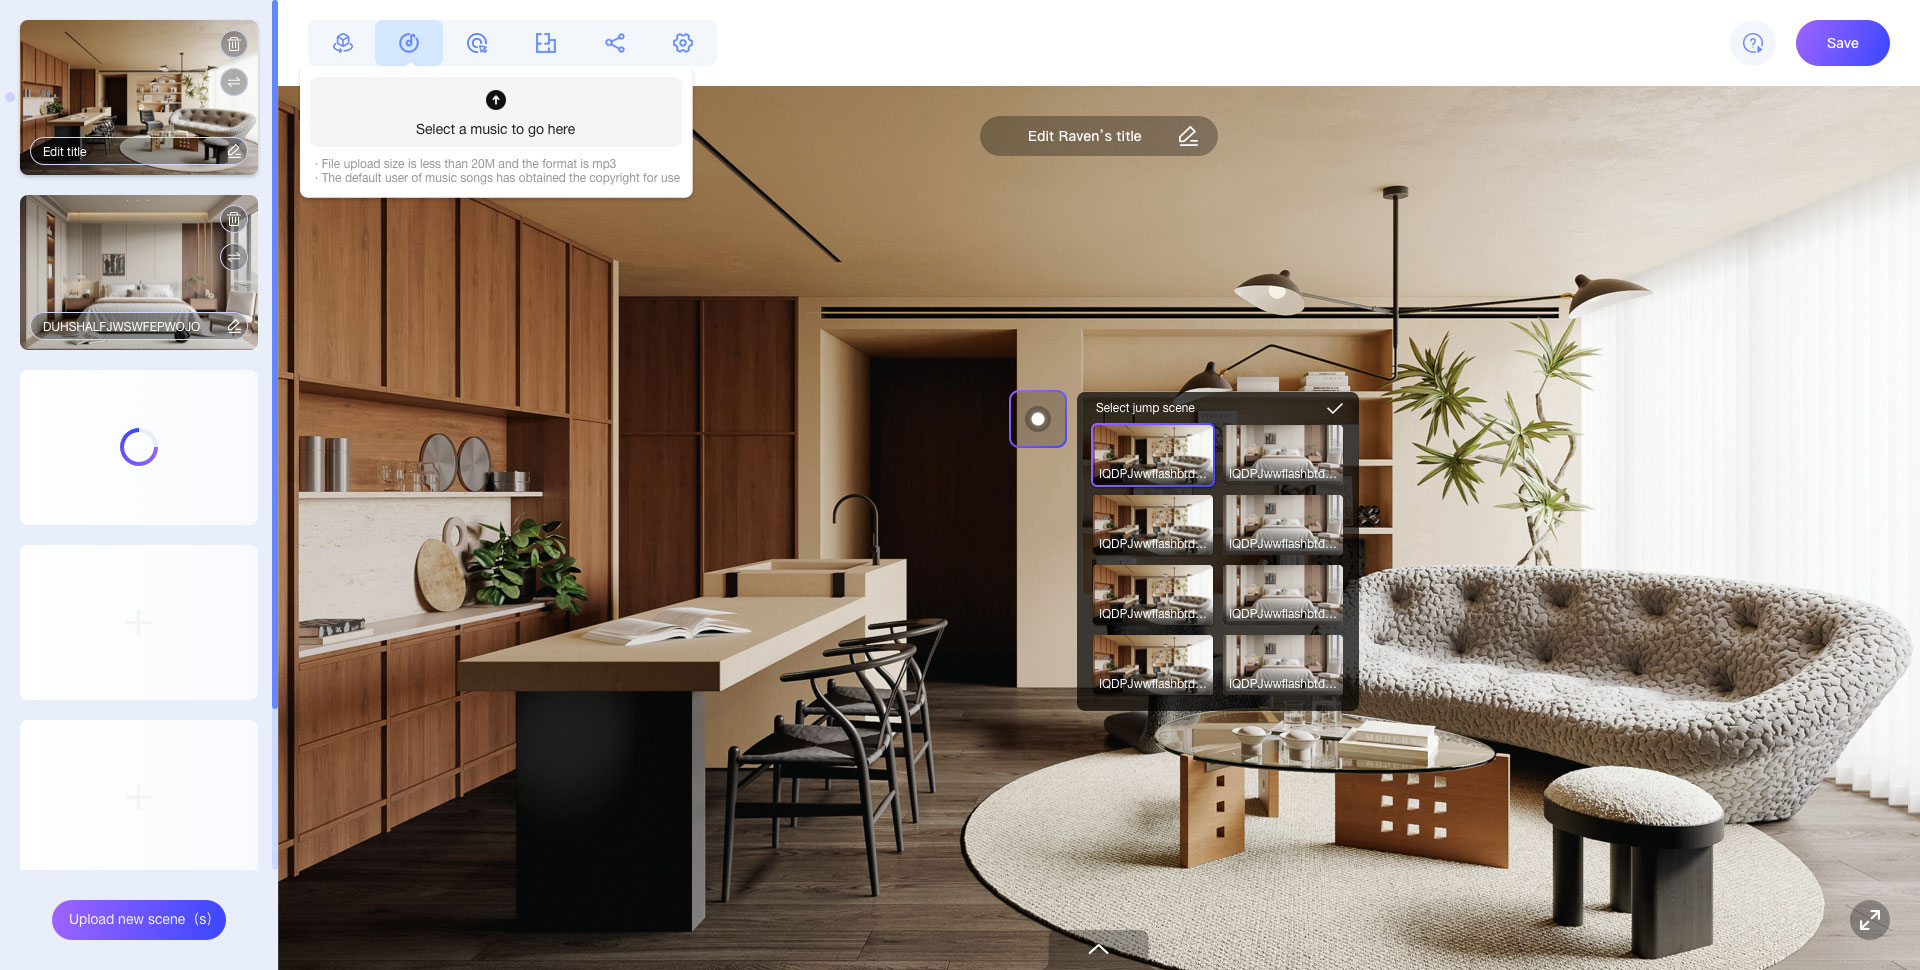
2.
Click the operation button in the upper left corner to set up the works one by one. Initial viewing angle: Can modify the angle of viewing the panorama for the first time;
Hotspot addition: Can set transitions for multiple panoramas;
House plan: A floor plan that can add this panorama;
Preview share:View the link to the work and set viewing permissions and passwords;
Global settings:Set preview effects such as opening special effects;
3.
Click "Save" in the upper right corner to enter the work management page. Export a panoramic image from 3ds Max The following are the detailed steps for rendering and saving a panoramic image using 3ds Max in combination with the V-RAY renderer:
1.
Select the V-RAY RendererOpen the 3ds Max software: Launch the 3ds Max application and open the scene file you need to render.
Open the Render Setup window: You can open the Render Setup window in the following ways:
Shortcut key: Press the "F10" key on the keyboard.
Menu bar: Select "Render" - "Render Setup".
Select the V-RAY renderer: In the opened Render Setup window, switch to the "Common" tab. Under the "Assign Renderer" rollout, click the button on the right side of "Production". In the popped-up "Choose Renderer" dialog box, select "V-Ray Adv" (the name may vary slightly in different versions), and then click "OK".
2.
Adjust the Image Output Size Ratio to 2:1Set the output size: In the Render Setup window, switch to the "Common" tab. In the "Output Size" area under the "Common Parameters" rollout, manually set the width and height of the image so that the ratio is 2:1. For example, you can set the width to 4000 pixels and the height to 2000 pixels. You can also calculate the height value automatically according to the ratio by entering the width value. After entering a value in the "Width" input box, click the "Lock Aspect Ratio" button (the icon is in the shape of a lock), so that when you adjust the width, the height will be automatically adjusted according to the 2:1 ratio.
3.
Set up the Panoramic CameraCreate a panoramic camera: In the Create panel of 3ds Max, switch to the "Cameras" tab, select the "V-Ray" camera type (if using the V-RAY renderer), and then click "V-RaySphere" (spherical camera) or "V-RayCylinder" (cylindrical camera). Both of these camera types can be used to create panoramic images. Click and drag the mouse in the view to create the camera.
Adjust the camera parameters: Select the created camera, and in the Modify panel, you can adjust various parameters of the camera, such as focal length, field of view, etc., to obtain an appropriate panoramic view.
4.
V-RAY Render SettingsImage Sampling: Switch to the "V-Ray" tab. In the "Image Sampler" rollout, select an appropriate sampler type, such as "Adaptive Subdivision", and adjust the relevant parameters as needed to control the rendering quality and speed.
Global Illumination: In the "Indirect Illumination" rollout, enable Global Illumination (GI), and select appropriate primary and secondary bounce engines, such as "Irradiance Map" and "Light Cache", and adjust the corresponding parameters.
Other Settings: According to the specific requirements of the scene, you can also adjust other parameters, such as ambient light, materials, lighting, etc.
5.
Render and Save the Panoramic ImageStart rendering: After setting all the parameters, click the "Render" button in the Render Setup window to start rendering the panoramic image. The rendering process may take some time, depending on the complexity of the scene and the performance of the computer.
Save the rendering result: After the rendering is completed, in the popped-up "Render Frame Window", click the "Save Image" button (the icon is in the shape of a disk). In the popped-up "Save Image" dialog box, select the file format to save (such as JPEG, PNG, etc.), specify the save path and file name, and then click "Save".
How can I use a camera to shoot a panoramic image with an aspect ratio of 2:1? The following are the general steps for using a camera to shoot a panoramic image with an aspect ratio of 2:1:
1.
Select the appropriate camera and lens:○
It is recommended to use a camera with high pixels and good image quality to ensure the details and clarity of the panoramic image.○
For shooting panoramic images, an ultra-wide-angle lens or a fisheye lens is very helpful. They can cover a wider field of view and reduce the number of times of shooting and stitching.2.
Set the camera parameters:○
Set the camera's shooting mode to manual mode (M) to accurately control the exposure parameters.○
Adjust the ISO (sensitivity) according to the shooting environment. Try to choose a lower ISO value to reduce noise, but if the light is dim, you can appropriately increase the ISO.○
Set the appropriate shutter speed and aperture size to obtain the correct exposure. Usually, a smaller aperture (such as f/8 - f/11) can provide a larger depth of field, ensuring that the entire scene is in sharp focus.○
Turn off the camera's autofocus function and switch to manual focus. Set the focus on the important elements in the scene to ensure the clarity of the panoramic image.3.
Prepare for shooting:○
Fix the camera with a tripod to ensure that the camera remains stable during the shooting process and avoid image blurring or inaccurate stitching caused by hand shaking.○
Determine the shooting scene and shooting direction, and plan how to shoot to completely capture the desired panoramic scene.4.
Shoot the images:○
Shoot a series of overlapping images in sequence from left to right or from top to bottom. When shooting, pay attention to having enough overlapping parts between each image. It is generally recommended that the overlapping degree be about 20% - 30% for subsequent stitching.○
Keep the horizontal or vertical direction of the camera consistent and avoid sudden changes in the shooting angle to ensure that the stitched panoramic image has a consistent perspective.○
During the shooting process, pay attention to changes in the light. If there are obvious changes in the lighting conditions, you need to adjust the camera parameters accordingly to ensure that the exposure of each image is consistent.5.
Post-processing:○
Import the shot images into a computer and use professional panoramic stitching software such as Adobe Photoshop, PTGui, etc.○
In the stitching software, follow the operation instructions of the software to stitch the shot images. The software will automatically identify the overlapping parts between the images and perform stitching and blending.○
Carry out post-processing adjustments to the stitched panoramic image, such as cropping the edges, adjusting the color, contrast, brightness, etc., to optimize the effect of the panoramic image.○
Finally, crop or adjust the processed panoramic image according to the ratio of 2:1 to make it meet the required size ratio.Different cameras and shooting scenes may require some adjustments and optimizations according to the actual situation. In addition, some cameras may have a built-in panoramic shooting function, and you can also use these functions to shoot panoramic images. However, during the shooting process, you also need to pay attention to the above key points to obtain better shooting results.